
.jpeg)
Let's face it, lockers can be quite dreary looking on the outside. The inside, however, is yours to create. The past couple years, I was "too cool" to decorate my locker. Big mistake. This year, I wanted to put my own creative spin on things. Instead of buying pre-made magnets (which are typically way overpriced), I decided to make my own. Considering I'm on a teenager's budget, I was thrilled the supplies cost under $6. So whether you want to decorate your dorm fridge or school locker, this is the perfect way to let your creativity shine!
P.S. The supplies make around 36 clothespins if you cut the magnetic strips in half vertically!
What You Will Need:
-Pair of scissors (already owned)-Clothespins (50 pack for $0.97 at Walmart)
-Washi tape ($1.44 each at Walmart)
-Magnetic tape strips (18 pack for $0.88 at Walmart)
-Painter's pen ($1.97 at Walmart)
Directions for Washi Tape Clothespin Magnets:
Step 1. Place the Washi Tape on the clothespin, lining up the edges on one side.

Step 2. Trim the excess Washi Tape (if there is any excess the scissors aren't quite catching, just fold it over the edge).


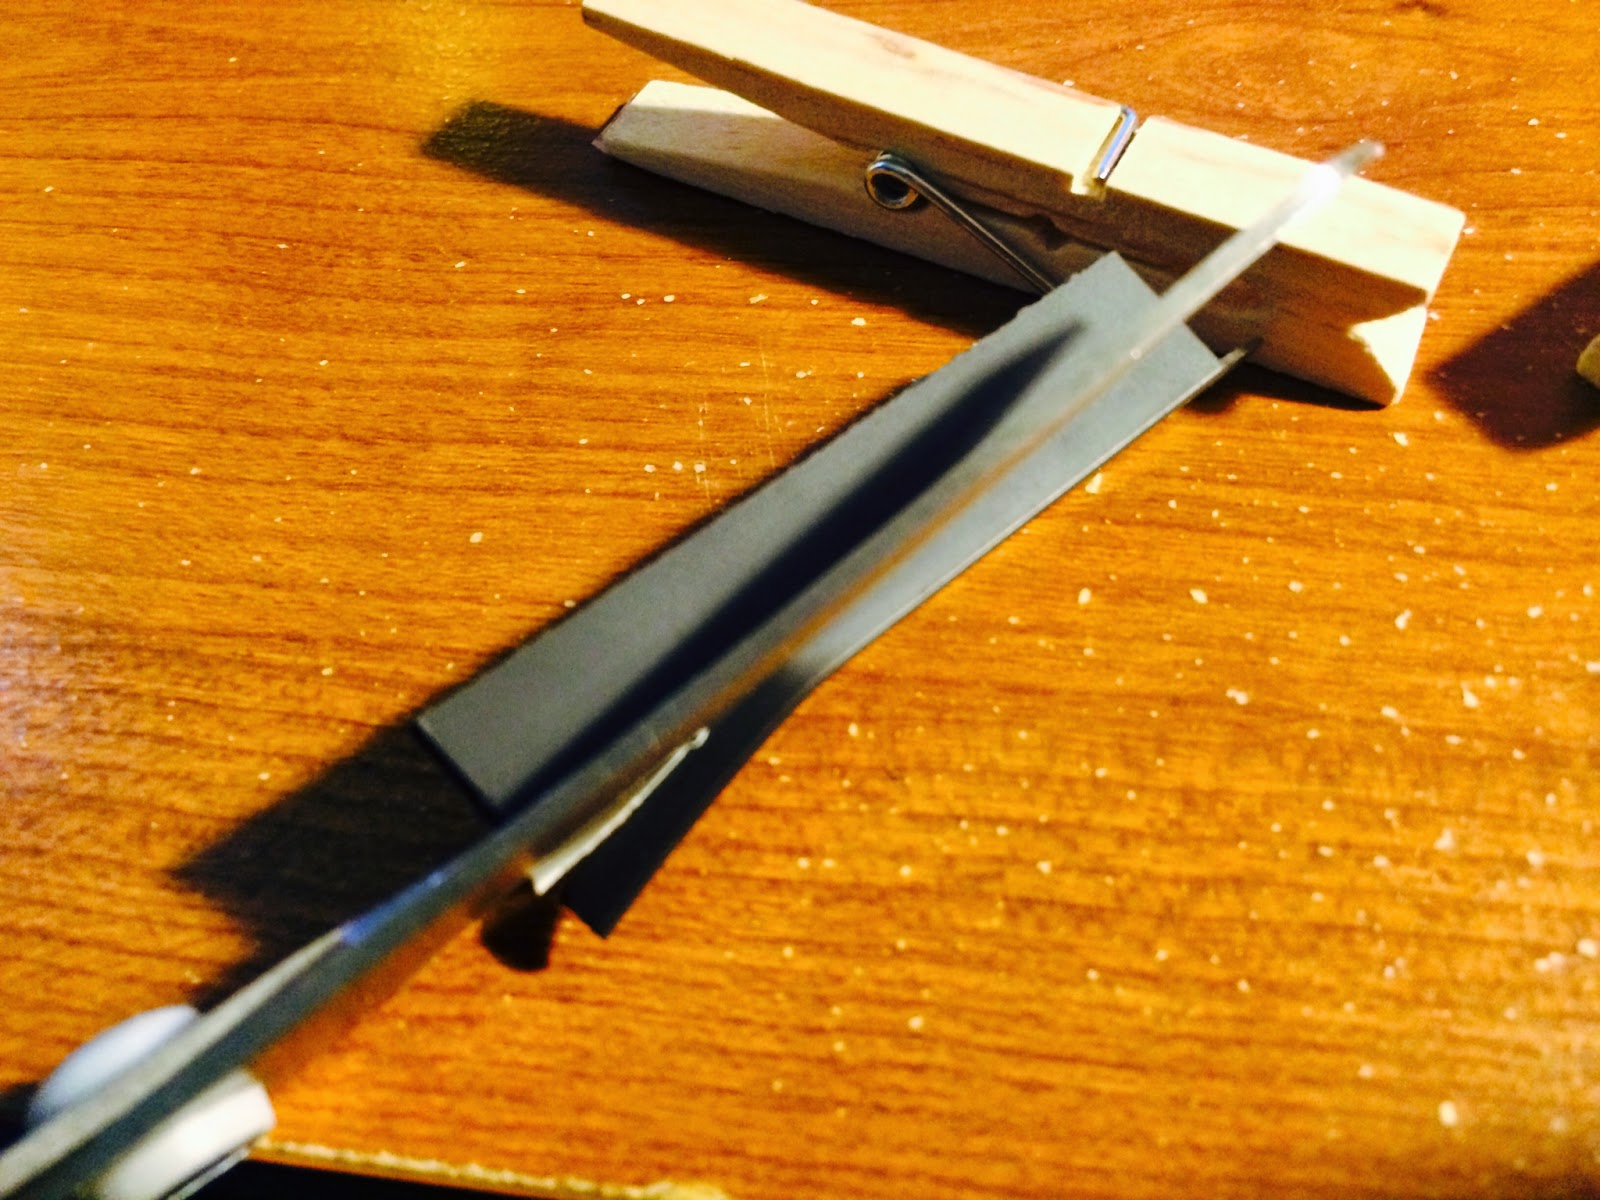
Step 3. Line up the magnetic tape strip to cover the top half of the clothespin, but trim the excess before you peel and stick it on. (My magnetic tape strips were 1/2 in x 4 in. I cut about 1/3 of the width off and 1/2 of the height.)


Directions for Painted Clothespin Magnets:
Step 1. Line up the magnetic tape strip to cover the top half of the clothespin, but trim the excess before you peel and stick it on. (My magnetic tape strips were 1/2 in x 4 in. I cut abut 1/3 of the width off and 1/2 of the height.)
Step 2. Turn over your clothespin so you are on the opposite side of the magnet. Shake your painters pen and try it out on a scrap piece of paper before the clothespin. After that, create whatever design you choose (I went with a mix of patterns and words).

Step 3. Let it dry for about an hour before touching it (it may dry faster but I would rather be safe than sorry).

Let me know how yours turned out in the comments!
No comments:
Post a Comment